Another Way To Install A Program On A Netbook
A Thumb Drive Can Be Used In Place Of An External Optical Drive
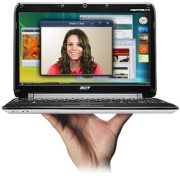
 Light-weight and small size make netbooks very portable. But, to achieve their compact size, certain items are missing from netbooks — most notably perhaps, internal CD/DVD drives.
This “disc deficit” is usually overcome by the purchase of an external (USB cable-connected) optical drive.
Today I want to point out that should you not happen to have an external drive available, frequently you can substitute, and use a “thumb drive” (“memory stick”) instead.. such as using the following method to watch DVD movies — see, Tech Tip for Travelers – Make Your Movies More Portable!
Tip of the day: Use a thumb drive to install programs on to a netbook.
To install a program (you have a CD for) onto a netbook using a thumb drive, you will need two things; one, access to a computer that has a CD/DVD drive and; two, a thumb drive large enough to hold the contents of the Install disc. [note: CD’s are roughly 700 MB’s (.7 GB’s) and DVD’s are typically 4.7 GB’s]
1) Go to the PC with the optical drive and insert the thumb drive. Then insert the Install disc into the drive tray.
Cancel (stop) any setup/install process from starting, should it try to “autostart”.
2) If the AutoPlay window opens, select “Open folder to view files” (which should be the bottom choice).
If you have disabled AutoPlay: Click Start > Double-click Computer (My Computer in XP/older) > right-click on the optical drive (CD-ROM) and choose Explore.
3) Drag the entire contents (all the files) of the CD/DVD to the icon for “removable drive” that is the thumb drive. Take mental note of what the installer executable’s name is – typically, it is setup.exe.
4) Use “Safely remove” and remove the thumb drive, and then insert it into your netbook. If the AutoPlay window opens, select “Open folder to view files” (which should be the bottom choice), if you have disabled AutoPlay: Click Start > Double-click Computer (My Computer in XP/older) > right-click on the removable drive (your thumb drive) and choose Explore. Find and then double-click the setup.exe.
That will “launch” the set up process and install the program on to your netbook, just as if it had been run from a disc.
Bonus tip: When you’re all done, you can drag all those setup files to the Recycle bin.
Copyright 2007-2010 © Tech Paul. All rights reserved.![]() post to jaanix
post to jaanix
| Share this post : | 
|

 Subscribe to Tech--for Everyone by Email


Hi there.
Great installation help…thanks, fixed my problem.
Anyone reading this guys stuff should bookmark it.
LikeLike
[…] Tech-for Everyone Another Way To Install A Program On A Netbook […]
LikeLike
Another great post.
Thanks for the tips and help.
Everyone, bookmark this site.
LikeLike
Jay,
I am glad you found my tutorial helpful. Thank you for the kind words.
LikeLike
What are the problems associated with software installation in Netbook?
LikeLike
Terric,
That sounds like a homework question. (And the article kinda answers it.)
LikeLike